When a clinician looks at a pressure injury, they aren't just guessing at its severity. They're using a standardized system called pressure ulcer staging to classify the wound based on how deep the tissue damage goes.
This staging system, which runs from Stage 1 (the mildest) to Stage 4 (the most severe), is the bedrock of effective wound care. It tells us what treatment to use, ensures the entire care team is on the same page, and is absolutely critical for patient outcomes.
Why Accurate Staging Is So Important

Think of staging as the first and most important chapter in the story of a wound. Getting it right from the very beginning dictates the entire plot, from the first steps of prevention to the most advanced healing strategies. It's so much more than a box to check on a form.
When we get the stage right, everyone—from the doctor to the nurse to the physical therapist—is speaking the same clinical language. That shared understanding is what prevents miscommunication, aligns the treatment plan, and ultimately protects the patient from a minor problem spiraling into a major one.
A Common Language for the Care Team
A reliable staging system gives us a clear, objective way to talk about the wound. When a nurse documents a "Stage 2 ulcer," another clinician immediately knows the exact level of tissue damage without needing a long-winded explanation.
This clarity is vital for a few key reasons:
- Smart Treatment Planning: The stage directly guides the choice of dressings, the type of support surface needed, and whether debridement is necessary.
- Clear Team Communication: It makes for smooth handoffs between shifts and different specialists, ensuring the patient receives consistent care.
- Tracking Progress: An accurate initial stage creates a baseline. It's how we know for sure if a wound is healing, getting worse, or just staying the same.
How We Got Here: The Evolution of Staging
The system we rely on today didn't just appear out of thin air. It has a rich history that's all about making care safer for patients. The first widely used numeric staging system popped up back in 1975, giving clinicians a way to classify ulcers based on the depth of tissue loss.
Building on that foundation, the National Pressure Ulcer Advisory Panel (NPUAP) developed its own system in 1989. This framework has been refined over the years and is now the gold standard used around the world. You can learn more about the history of pressure ulcer staging and how it shaped modern care.
Accurate pressure ulcer staging is the critical first step in preventing a minor issue from becoming a life-threatening complication. It translates what we see on the skin into a clear, immediate plan of action.
Identifying Stage 1 and Stage 2 Injuries
When it comes to pressure ulcers, catching them early is everything. The first two stages are a critical window where we can step in and stop a small problem from becoming a serious, full-blown wound. Knowing what to look for is the first and most important skill for any caregiver.
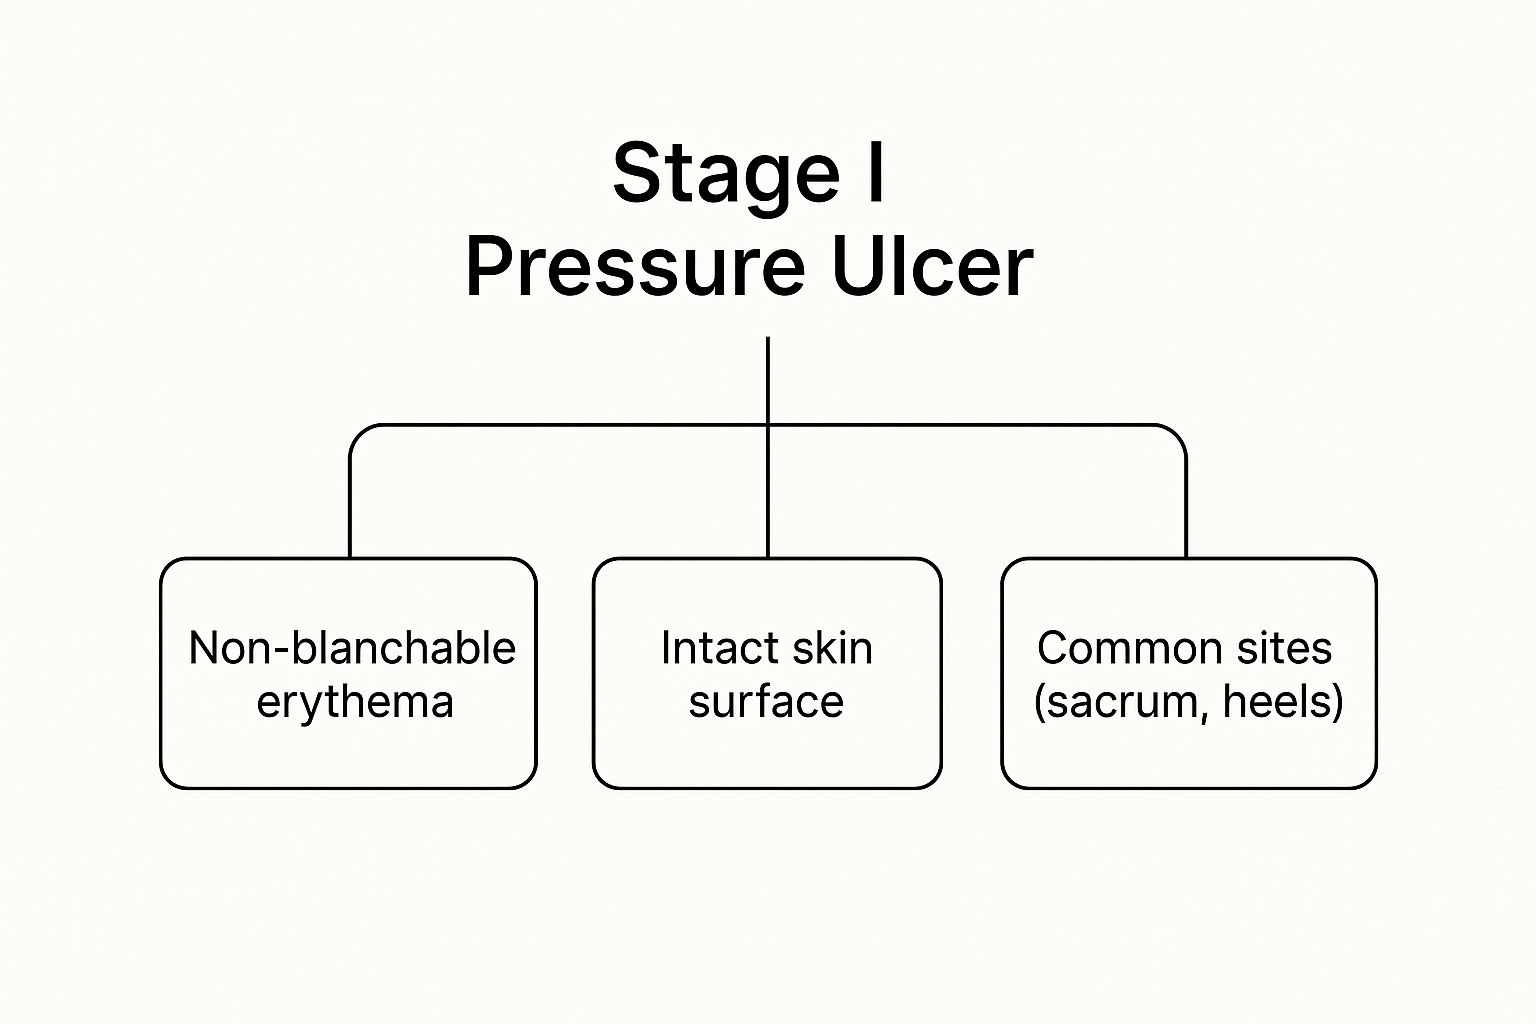
A Stage 1 pressure injury is the body’s first alarm bell. You'll see an area of skin that's still intact, but it has a persistent spot of redness that doesn’t fade. Here’s a simple way to think about it: if you press your thumb on healthy skin, the area turns white for a second before the color rushes back. That’s called blanching. With a Stage 1 injury, the redness stays put even when the pressure is gone. It's a clear sign that the blood supply to that area is struggling.
Recognizing Stage 1 in Different Skin Tones
Spotting that persistent redness can be tricky on darker skin tones, where it might not stand out visually. In these cases, we have to use our other senses and ask the right questions. You need to pay attention to other clues:
- Temperature: Does the area feel warmer or cooler than the skin around it?
- Texture: The skin might feel different—a little firmer or even mushy and boggy compared to the surrounding tissue.
- Patient Sensation: The person might tell you the spot hurts, tingles, or itches. Never ignore what the patient is feeling.
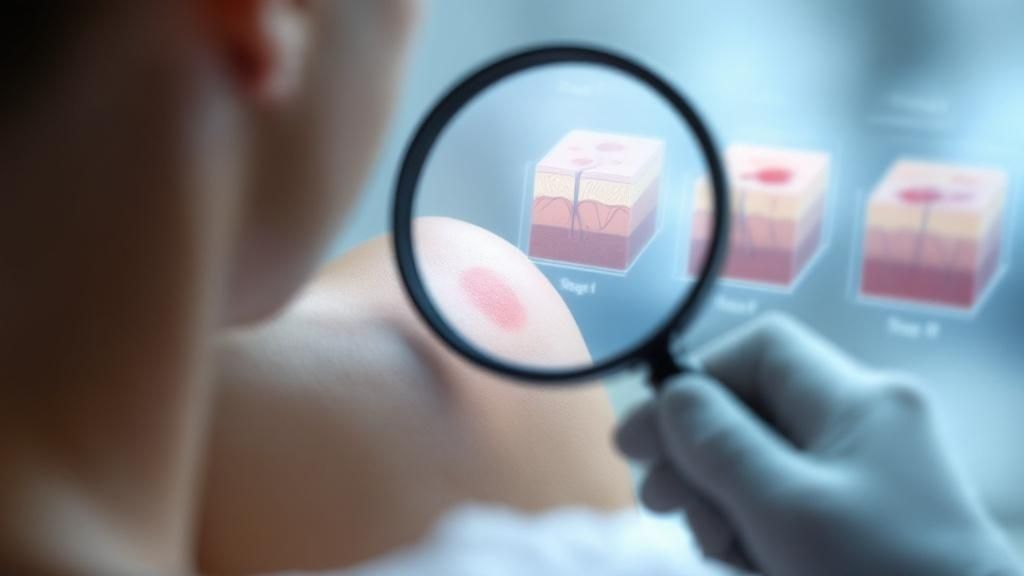
The following infographic gives a great visual breakdown of what a Stage 1 pressure ulcer looks like.
This image really drives home the point: even though the skin isn't broken, that non-blanchable redness, especially over a bony spot like the tailbone or heels, tells you it’s a Stage 1 injury.
Distinguishing a Stage 2 Injury
A Stage 2 pressure injury is where the skin has officially broken down. We’re now looking at partial-thickness skin loss. Think of it as a shallow, open wound with a reddish-pink base. It can look like a simple scrape, an abrasion, or a blister that has popped. The defining feature is that the top layer of skin has been lost, exposing the dermis underneath.
It’s incredibly important not to confuse a Stage 2 ulcer with other skin problems, like moisture damage, which looks similar but has a totally different cause and treatment. A true Stage 2 ulcer is a direct result of pressure or shearing forces.
A Stage 2 pressure injury is essentially a shallow wound. There is no visible slough (dead tissue) or bruising, and the damage is confined to the top layers of the skin, never exposing fatty tissue.
Spotting these early-stage injuries is half the battle; knowing what to do next is just as crucial. For families caring for a loved one at home, understanding how to manage these wounds is essential for healing and preventing things from getting worse. You can get more practical advice by reading up on pressure ulcer treatment and home care, which provides real-world strategies for handling these situations outside a hospital. Catching the signs early and responding with the right care truly makes all the difference.
When Wounds Go Deep: Assessing Stage 3 and Stage 4 Pressure Injuries

Once a pressure injury progresses beyond the initial stages, we’re no longer dealing with surface-level damage. We're now in the territory of full-thickness wounds, where tissue destruction runs deep. This is where accurate pressure ulcer classification becomes more than just charting—it’s a critical tool for preventing life-threatening complications.
When a wound reaches Stage 3 or Stage 4, it’s a clear sign of a major breakdown in tissue integrity.
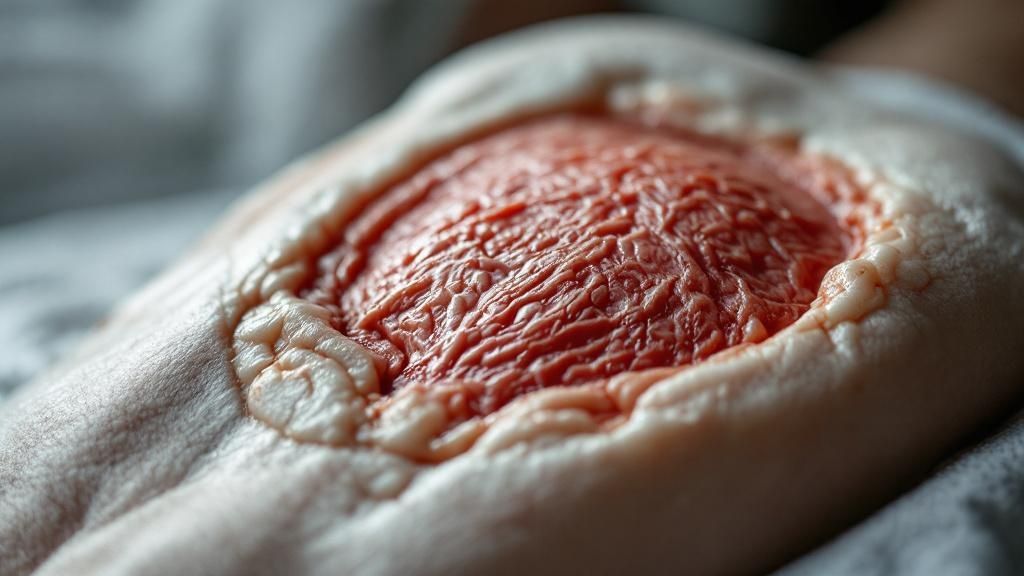
Stage 3: A Crater Through the Skin
A Stage 3 pressure injury signifies full-thickness skin loss. Imagine a crater forming where both the epidermis and dermis have been completely eroded, exposing the fatty subcutaneous tissue beneath. You’ll be able to see this adipose tissue, but you won't see any underlying muscle, tendon, or bone.
The depth of a Stage 3 wound can be deceiving, as it depends entirely on its location. An ulcer on the bridge of the nose or an ear, where there's little fat, might be quite shallow. In contrast, one on the sacrum or buttock could be surprisingly deep because of the thick layer of adipose tissue in that area.
Inside the wound bed, you might also find:
- Slough: Yellowish, tan, or greenish dead tissue that has a stringy or mushy texture.
- Eschar: A thick, leathery scab that is usually black or brown.
- Undermining or tunneling: These are hidden pockets of dead space that extend from the wound under the intact skin, like a cave under a cliff's edge.
The key identifier for Stage 3 is that while fat is visible, the deeper structures like muscle and bone are not. Even if slough or eschar is present, it's still a Stage 3—unless it completely covers the wound bed, making it unstageable.
Stage 4: Down to the Bone
A Stage 4 pressure injury is the most severe classification, representing a catastrophic loss of skin and tissue. At this point, the damage is so extensive that bone, tendon, or muscle is directly exposed and can be seen or felt within the wound.
This level of destruction creates a direct pathway for bacteria, carrying an extremely high risk of serious infections like osteomyelitis (bone infection), which is notoriously difficult to treat.
Just like with Stage 3, you'll often see slough, eschar, undermining, and tunneling, but these features are usually much more extensive. The exposure of deep, vital structures is the definitive sign that the patient needs an immediate, aggressive, and highly specialized treatment plan. Knowing how to heal these deep wounds faster is absolutely essential to preventing systemic infection and promoting any chance of recovery.
This standardized pressure ulcer classification system isn't just for individual patient care; it’s vital for public health. Data shows that in hospital settings, pressure injury prevalence rates can be anywhere from 5% to 15%, a sobering statistic that highlights just how common this problem is. You can read more about these statistical findings and the NPUAP staging system.
Ultimately, identifying a Stage 3 or Stage 4 wound is a clear call to action. It’s a signal that demands immediate, focused medical intervention to save not just tissue, but potentially the patient’s life.
Decoding Unstageable and Deep Tissue Injuries
Beyond the four numbered stages, two other classifications often trip people up: Unstageable injuries and Suspected Deep Tissue Injuries (DTI). These aren't just "worse" stages; they represent unique clinical puzzles that require a completely different approach and immediate, careful attention.
An Unstageable pressure injury is a wound where the true depth is a complete mystery. This happens when the wound bed is covered by slough (a stringy, yellowish dead tissue) or eschar (a thick, leathery black or brown scab). Because this debris blocks the view, a clinician simply can’t see how deep the damage really goes.
The core principle is simple: You can't stage what you can't see. An "Unstageable" label is temporary. Once the slough or eschar is cleaned away—a process called debridement—and the base of the wound is visible, it must be re-staged as either a Stage 3 or Stage 4 to accurately reflect its true depth.
The Iceberg Under the Skin
A Suspected Deep Tissue Injury (DTI) is probably the most deceptive and dangerous of all. On the surface, it might look like a localized patch of deep purple or maroon intact skin. Sometimes it presents as a blood-filled blister. The skin isn't broken yet, but this seemingly minor discoloration is a massive red flag.
Think of a DTI as an iceberg. What you see on the surface is just the tip. Underneath that intact skin, a devastating amount of tissue damage has already happened, and the injury can deteriorate with frightening speed, often becoming a severe Stage 3 or Stage 4 ulcer in a matter of days.
These two challenging classifications show just how complex pressure ulcer staging is, going far beyond simple open wounds. Understanding this full spectrum is critical for giving the right care. To get a bigger picture, it helps to learn about the 6 types of wounds and how they all fit together.
Formally adding DTIs to staging systems was a huge step forward for wound care. For years, these injuries were often missed or misdiagnosed, leading to the wrong treatment or dangerous delays. A 2005 consensus conference finally gave DTI its own category, shining a light on the urgent need for early intervention to save tissue. This evolution shows how our clinical guidelines must adapt as we learn more. You can discover more about how these classification guidelines evolved.
Recognizing these injuries takes a sharp clinical eye. An unstageable wound is a hidden threat, while a DTI is a ticking clock. Both demand immediate, strategic action to prevent catastrophic tissue loss.
Of course. Here is the rewritten section, crafted to sound completely human-written and natural, following all your specified requirements.
Putting Classification Into Daily Clinical Practice
Knowing the stages of a pressure injury is one thing. Actually using that knowledge to protect your patients in the day-to-day grind? That’s where the real skill comes in. Think of accurate pressure ulcer classification as the engine that drives the entire care plan. It ensures every decision you make is grounded in a solid understanding of how severe the wound truly is.
This all starts with documentation that’s borderline obsessive. When you find a pressure injury, your notes need to be sharp and precise. Don't just jot down the stage—detail its size, where it is, and whether you see any slough or eschar. This creates a crystal-clear baseline, allowing the entire team—from physicians and therapists to dietitians—to see what you see and track progress together.
From Staging to Actionable Care Plans
An accurate stage isn’t just a label; it’s a direct order for treatment. The moment you classify a wound, you set in motion a specific set of actions, guiding everything from the type of support surface a patient needs to the specialized dressings you’ll use.
- Stage 1: This is your cue for immediate pressure redistribution. We're talking specialized cushions and strict repositioning schedules to stop the skin from breaking down any further.
- Stage 2: This calls for protective dressings that create a moist wound environment. The goal here is to help that partial-thickness wound heal without interruption.
- Stage 3 & 4: Now we’re in more aggressive territory. These wounds often require debridement to clear away dead tissue and advanced dressings to handle heavy drainage.
- Unstageable & DTI: These are huge red flags. They demand close monitoring and, more often than not, a consult with a specialist to figure out just how deep the damage goes.
Reassessing the wound is just as important as that first look. A wound is a moving target—it can get better or worse in a hurry. Your documentation has to keep up, reflecting these changes so the treatment plan stays relevant and effective. This is especially true for families managing care after discharge. For more on this, check out our guide on effective post-discharge wound care at home, which gives practical steps for keeping the healing process on track.
A wound's stage is its clinical fingerprint. It gives you a unique, instant snapshot of the tissue damage, allowing the entire care team to launch a rapid, targeted response.
The Bigger Picture Impact of Classification
Getting pressure ulcer classification right has ripple effects far beyond the bedside. On a larger scale, standardized systems are what allow us to track how common these injuries are and improve care quality across the board. Take the UK, for example. The government officially classified pressure ulcers as an avoidable harm and made reducing them a top priority in a major quality improvement program. It was a powerful acknowledgment of the critical role nurses play in prevention. You can discover more insights about these public health initiatives if you're interested in the policy side of things.
At the end of the day, your careful assessment feeds directly into your facility's quality metrics and even its financial reimbursement. Every time you accurately classify a wound, you’re not just doing a task—you’re strengthening the care plan, improving how your team communicates, and reinforcing a system that’s built to give patients the best possible outcome.
Avoiding Common Assessment Pitfalls
Even the most experienced clinicians can get tripped up in the gray areas of pressure ulcer staging. Let's be honest, wounds don't always follow the textbook. Making the right call from the very beginning requires sharp clinical judgment, and nailing that initial diagnosis is the first step toward effective treatment and better home health wound care patient outcomes.
One of the most common mix-ups? Distinguishing a Stage 2 pressure injury from moisture-associated skin damage (MASD). They can look deceptively similar, but their origins are completely different. A Stage 2 ulcer is a direct result of pressure or shear, usually showing up as a shallow, distinct crater over a bony area. MASD, on the other hand, comes from prolonged exposure to moisture (like urine or sweat) and tends to look more like a widespread, diffuse patch of redness or erosion with fuzzy, undefined borders.
Navigating Assessment Challenges
Darkly pigmented skin presents another major hurdle. The classic tell-tale sign of a Stage 1 injury—non-blanchable redness—can be nearly impossible to see. In these situations, you have to become a detective and rely on other senses to pick up on early tissue distress.
- Feel for Temperature Changes: Is the area warmer or cooler to the touch than the skin around it? That subtle difference can be a huge clue.
- Check Tissue Consistency: Gently palpate the area. Does it feel boggy, mushy, or strangely firm? These changes in texture often signal underlying trouble long before the skin breaks.
- Listen to Your Patient: Never underestimate the power of asking. A patient's complaint of pain, tenderness, or even itching in a specific spot is a critical piece of the puzzle.
A foundational rule in wound care is that you never "reverse stage" a healing pressure ulcer. This is a common and serious error in documentation that misrepresents the wound's history.
Finally, it's absolutely vital to understand why we don't reverse stage. A healing Stage 4 ulcer doesn't magically become a Stage 3, then a Stage 2. Why not? Because the deep tissues that were lost—the muscle, fat, and fascia—don't grow back. Instead, the body fills that crater with scar tissue, which is fundamentally different.
Documenting it as a "healing Stage 4" is the only way to accurately reflect the true extent of the original injury. This preserves the wound's history and ensures future care plans account for the significant tissue loss that once occurred.
Frequently Asked Questions About Pressure Ulcer Staging
Even with clear guidelines, some parts of pressure ulcer staging can be tricky. It's one of those areas where hands-on experience makes all the difference. Let's walk through some of the most common questions that come up in the field to help sharpen your assessment skills.
Why Can't You Reverse Stage a Healing Pressure Ulcer?
This is a classic point of confusion. A healing pressure ulcer should never be back-staged—for example, from a Stage 4 to a Stage 3. It might seem logical, but it’s clinically incorrect.
The reason is simple: the body doesn't regenerate the original, complex tissues like muscle or fat that were destroyed. Instead, it fills in the hole with granulation tissue, which is essentially a type of scar tissue.
So, you must document it as a "healing Stage 4 ulcer." This keeps the wound's history intact and properly flags its original severity. Calling it a Stage 2 would completely misrepresent the initial damage and could lead to underestimating future risks.
What Is the Difference Between a Stage 2 Ulcer and MASD?
Getting this right is absolutely critical because it dictates the entire treatment plan. A Stage 2 pressure ulcer is caused by intense, focused pressure or shear forces. You'll typically see a shallow, distinct wound with a red-pink base, almost always sitting over a bony spot like the tailbone or heel.
On the other hand, moisture-associated skin damage (MASD) comes from prolonged skin exposure to irritants like urine or stool. It looks very different—more like a widespread, angrier inflammation with poorly defined edges. And it isn't necessarily located over a bony prominence.
Correctly identifying the wound's origin—pressure versus moisture—is one of the most important first steps in the entire care process. Misclassification here leads to ineffective treatment plans from the very start.
If Eschar Comes Off and Reveals a Deeper Wound, What Do I Do?
You need to re-stage the wound immediately. The initial classification of "Unstageable" was just a placeholder. It simply meant the eschar (that thick, dead tissue) was covering the wound bed, making a true assessment impossible.
Once the eschar is removed (debrided) and you can finally see the base of the wound, you must re-classify it based on the deepest tissue you can see. If you now have a clear view of exposed bone, you'll document it as a Stage 4 pressure ulcer. This updated stage is vital for adjusting the care plan to match the wound's true severity.
At Rapid Wound Care, we specialize in managing complex wounds right in the comfort of your home. If you or a loved one is dealing with a challenging pressure injury, our certified professionals are ready to provide expert, personalized care. Reach out within 24 hours to start the healing process.