When it comes to healing a wound, the care you provide at home is just as important as the treatment you receive from your doctor or nurse. Think of this as a partnership. Your healthcare provider has the medical expertise, but you have the most powerful tool of all: your daily attention and actions. This guide is here to walk you through that journey, making you an active, confident partner in your own recovery.
Your Crucial Role in Healing
Let's be honest—dealing with a new wound can feel a little scary and overwhelming. You might be worried about what to do, what not to do, and whether everything is healing as it should. That’s completely normal.
But here’s a different way to look at it: you are the most important person on your healing team. Think of your doctor as a coach. They can draw up the perfect game plan, but you're the player on the field, making it happen every single day. The small things you do—like changing a dressing correctly or just paying attention to how the wound looks and feels—have a huge impact on how well and how quickly you heal.
A Partnership for Better Healing
The best wound care happens when you and your healthcare provider work together. They bring the clinical knowledge, but you bring something they can't see in a 15-minute appointment: real-time, day-to-day insight into your own body. This teamwork is most effective when you feel informed and know what to look for.
The big idea in modern wound care is simple: a patient who understands their own healing process is a healthier patient. When you know why you're being asked to do something, you're more likely to do it right, which leads to a faster, smoother recovery.
This isn't about just blindly following orders. It's about you becoming a key decision-maker in your own healthcare.
Knowledge Is Your Best Medicine
Learning about your wound and how to care for it does more than just help you follow a list of instructions. It turns you into the first line of defense for your own health. When you know what normal healing looks like, you can spot the earliest signs of trouble long before they turn into major problems.
This understanding helps you in very real ways:
- Prevent Setbacks: Catching an infection early can be the difference between a quick recovery and a serious complication requiring another hospital visit.
- Heal Better: Using the right techniques can minimize scarring and help your body rebuild strong, healthy tissue.
- Feel Less Anxious: Knowledge takes the place of fear. When you understand the healing process, it feels less mysterious and gives you a powerful sense of control.
Ultimately, you are the one who makes the treatment plan succeed. By stepping into this role, you’re taking charge of your recovery from day one. This guide will give you the wound care patient education you need to feel empowered and ready.
How Your Body Heals a Wound Step-by-Step
When you're caring for a wound, it helps to know why you're doing what you're doing. Your body is a remarkable self-repairing machine, and the healing process is a fascinating, predictable sequence of events. Think of it like building a house—it’s a step-by-step process to repair the damage.
Understanding this journey is a cornerstone of wound care patient education. It empowers you to recognize what’s normal, spot potential problems early, and appreciate the incredible work happening just beneath your skin.
The image below gives you a bird's-eye view of the general timeline for these healing phases.
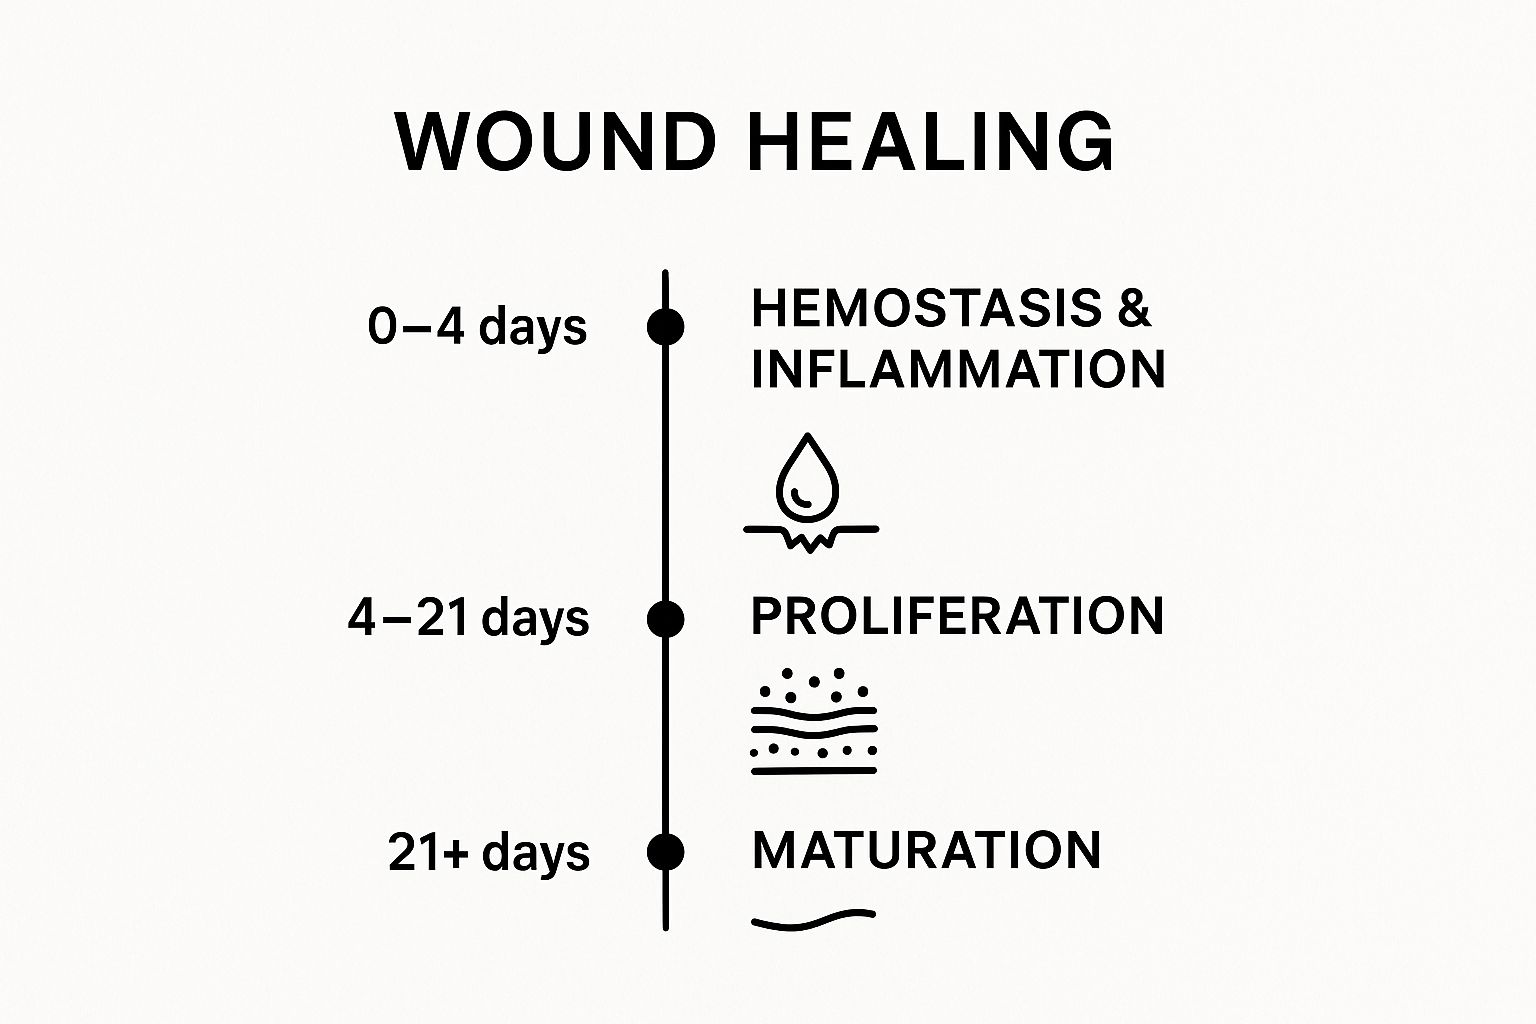
As you can see, healing isn't just one thing. It's a series of stages, with different biological activities taking center stage over the first few days, weeks, and even months.
Stage 1: The Emergency Response (Hemostasis)
The second an injury occurs, your body’s absolute first priority is to stop the bleeding. This is the hemostasis stage. Imagine it as the emergency crew arriving at a construction site to cap a gushing water main before any real building can start.
First, the blood vessels around the wound clamp down to restrict blood flow. Then, tiny cell fragments called platelets swarm the area. They stick to each other and the wound edges to form a temporary plug, like a quick patch on a leaky pipe. Finally, these platelets release signals that activate clotting factors to create a tough fibrin mesh over the plug, forming the scab you see on the surface.
Stage 2: Laying the Foundation (Inflammation)
Once the bleeding is contained, it's time for cleanup and prep work. This is the inflammation stage, and it usually lasts for the next few days. Don't let the word "inflammation" worry you; a certain amount is not only normal but absolutely essential for proper healing.
During this phase, your body dispatches specialized white blood cells to the scene. Their mission is twofold:
- Fight Infection: They act like security guards, destroying any bacteria or debris that got into the wound.
- Clear the Area: They remove dead and damaged tissue, essentially creating a clean, stable site for rebuilding.
This is precisely why you'll see some redness, swelling, and warmth. It's a clear sign that the "demolition and cleanup crew" is on the job, laying a perfect foundation for the new tissue to come.
This initial phase is a critical setup for a successful recovery. Your body is creating a perfectly controlled environment for healing to begin. While the wound might look a bit angry, this is your immune system working exactly as it should.
Stage 3: Rebuilding the Structure (Proliferation)
With the site prepped and clean, the actual rebuilding—or proliferation—can begin. This is where your body starts creating new tissue to fill in the wound, much like framing a house and running new electrical and plumbing lines. This stage can go on for several weeks.
You'll see a special, fragile tissue called granulation tissue start to form from the base of the wound. It's typically pink or reddish and has a bumpy, almost berry-like texture. This new tissue is packed with blood vessels that bring in the oxygen and nutrients needed for construction. At the same time, new skin cells begin to creep across this fresh bed of tissue from the wound's edges, slowly pulling it closed.
Stage 4: Final Touches and Remodeling (Maturation)
The last and longest stage of healing is maturation, also known as remodeling. This phase can last for a year or even more. The basic structure is built, but now it's time for all the finishing work—strengthening the walls, smoothing the surfaces, and making the repair as strong as possible.
During maturation, the disorganized collagen that was laid down in a hurry gets replaced with a much stronger, more organized type. This process dramatically increases the strength of the new skin, making it more like the surrounding tissue. You'll notice the scar will slowly flatten, soften, and fade. For those dealing with more significant injuries, supporting this final phase is key. We cover this in our guide on how to heal deep wounds faster. It's this long-term remodeling that determines how your scar will ultimately look and feel.
7. Putting It All Together: Your At-Home Wound Care Routine
Now that you understand the amazing work your body does to heal, let's talk about your role in the process. Consistent and correct care at home is the fuel that powers your recovery. This isn't about performing complex medical procedures; it's about building a simple, reliable routine for every time you change your dressing.
Think of it like tending a garden. For anything to grow, you need to provide the right conditions—a clean bed, the right amount of moisture, and protection from harm. Your daily wound care routine does exactly that, creating the perfect environment for your body to do its job.
Mastering these hands-on steps is a crucial part of your wound care patient education. It puts you in the driver's seat of your own recovery, giving you the confidence and skill to ensure a safe, successful outcome.
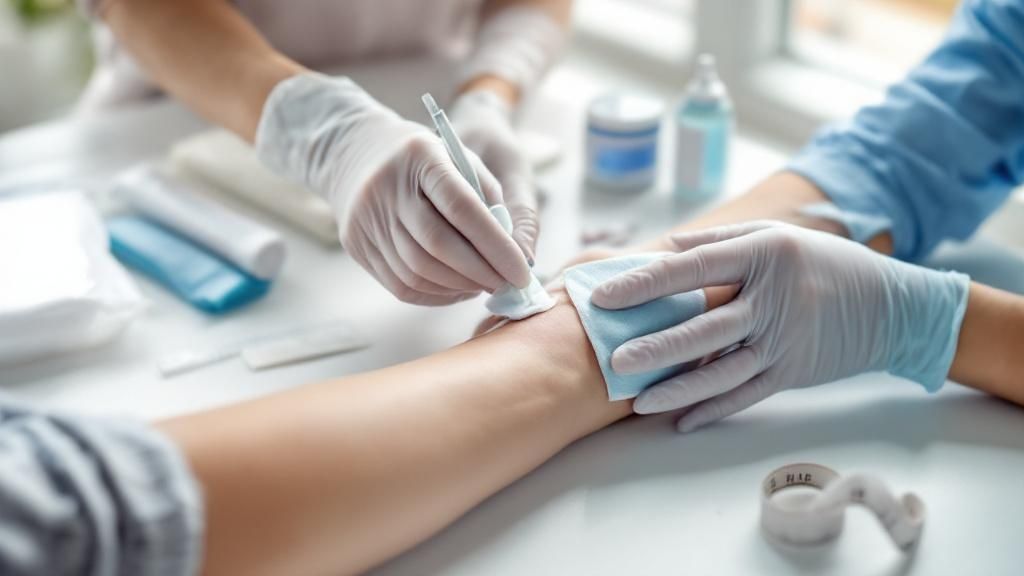
Step 1: Prepare Your Workspace
Before you even think about touching the wound, the first and most critical step is to prepare your space and yourself. A clean environment is your best defense against infection.
Start by gathering all of your supplies. Lay them out on a clean, uncluttered surface, like a freshly disinfected countertop or a clean towel. Having everything you need within arm's reach is key—it prevents you from scrambling for something mid-change and potentially contaminating the area.
Next, and this is non-negotiable, wash your hands thoroughly. Use soap and warm water, and scrub for at least 20 seconds (singing "Happy Birthday" twice is a great timer). If you can't get to a sink, a good alcohol-based hand sanitizer is the next best thing.
This simple act is the single most effective way to prevent infection. Never, ever skip it.
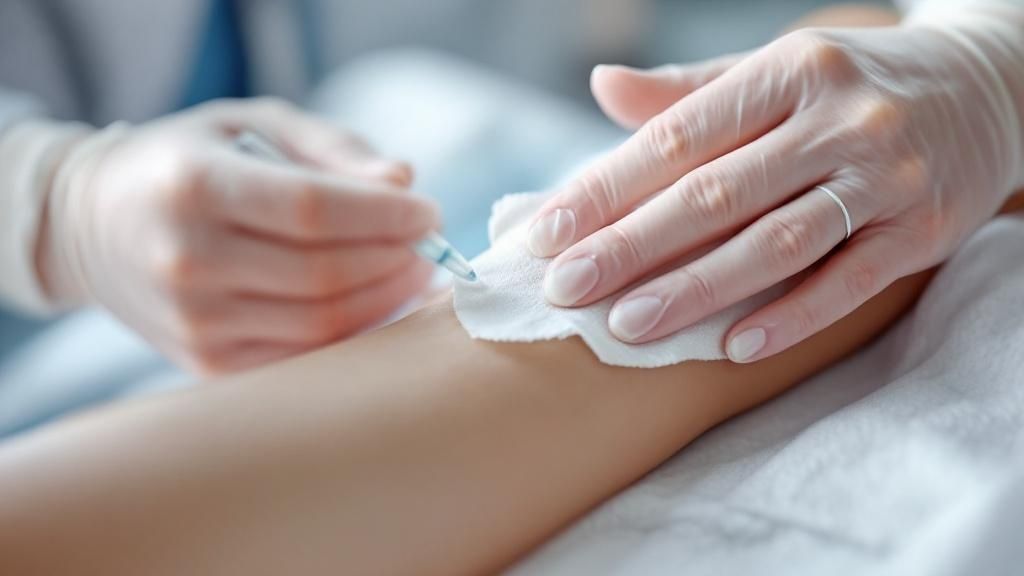
Step 2: The Dressing Change—A Step-by-Step Guide
With your supplies ready and hands clean, you can begin. Following these steps in order, every single time, will build a safe and effective habit. For more detailed instructions, you can always refer to our comprehensive guide on at-home wound care.
- Remove the Old Dressing: Gently loosen the tape or edges of the old bandage. If it’s stuck, don’t yank it. Moisten the edges with a bit of saline solution or water to help the adhesive release without tearing your skin. Pull the dressing back in the same direction your hair grows to minimize any stinging. Immediately place the old dressing into a disposable bag.
- Wash Your Hands (Again!): Yes, again. After touching the old, used dressing, it's vital to re-wash your hands or use hand sanitizer before you touch the clean wound.
- Inspect the Wound: Take a good, honest look. Is anything different today? Make a mental note of the color, size, and any fluid. We'll cover the specific warning signs to look for in the next section, but this daily check-in is your early warning system.
- Clean the Wound Gently: Use the cleaning solution your doctor or nurse recommended (this is often a simple sterile saline solution). Moisten a fresh gauze pad and gently clean the wound, starting from the center and wiping outwards. Avoid aggressive scrubbing—you don't want to harm the fragile new tissue that's trying to form.
- Pat the Surrounding Skin Dry: Using another clean, dry gauze pad, gently pat the healthy skin around the wound. The wound bed itself needs to stay moist, but the surrounding skin must be dry so the new dressing can stick properly.
- Apply the New Dressing: Apply any medicated ointment or gel your provider prescribed directly onto the wound or the new dressing pad. Center the fresh dressing over the wound, making sure it extends about an inch onto the healthy skin on all sides. Secure it with tape, but try to avoid placing tape on any fragile or irritated skin.
Your Essential Wound Care Supply Checklist
Being prepared is half the battle. Having a well-stocked kit means you'll never be caught off guard. Here’s a checklist of the basics you should always have on hand.
| Supply Item | Purpose and Key Considerations |
|---|---|
| Gauze Pads (Sterile) | Used for cleaning the wound and for drying the surrounding skin. Always use a fresh one for each step. |
| Saline Solution | The standard for gentle and effective wound cleaning. You can buy pre-made sterile saline or make your own. |
| Medical Tape | To secure dressings. Paper tape is often gentler on sensitive skin. |
| Non-Stick Dressings | These have a special coating to prevent them from sticking to the healing wound bed, making changes less painful. |
| Disposable Gloves | An extra layer of protection to keep things clean. Put on a fresh pair after removing the old dressing. |
| Scissors (Dedicated) | A clean pair of scissors used ONLY for cutting dressings and tape. Disinfect with alcohol before each use. |
| Prescribed Ointments | Any specific antibacterial or hydrogel ointments recommended by your healthcare provider. |
| Small Trash Bags | For immediate and safe disposal of used dressings and supplies. |
Keeping these items together in a clean, dry box will make your daily routine much smoother and safer.
Busting a Big Wound Care Myth
Part of good wound care patient education is unlearning bad advice you might have heard over the years. One of the biggest and most persistent myths is that you should "let a wound air out" to heal.
The truth is actually the opposite. Decades of research have shown that wounds heal faster, better, and with less scarring when they are kept clean, protected, and—most importantly—moist.
A covered wound creates what we call a "moist healing environment." This moisture allows new skin cells to travel easily across the wound bed to close the gap. It also protects the delicate new tissue from bacteria and prevents a thick, hard scab from forming, which can actually get in the way of healing.
This principle is a cornerstone of modern wound care. In fact, the market for specialized wound care centers was valued at USD 16.1 billion in the U.S. in 2022 and is projected to reach USD 25.27 billion by 2034. This growth, tracked by firms like Precedence Research, shows a major shift toward educating patients and empowering them with the right knowledge for better self-care—which is exactly what you are doing right now.
Identifying Warning Signs and When to Call a Doctor
While your daily home care is essential, you're also the first line of defense in your own healing journey. Think of it this way: your body has a remarkable ability to repair itself, but sometimes it runs into trouble and needs professional backup. Knowing when to make that call is a crucial skill in wound care patient education.
You're in the perfect position to spot problems early. After all, you see your wound every day. You'll become an expert at noticing subtle shifts that signal something is wrong. This guide will walk you through exactly what to look for, so you can feel confident telling the difference between normal healing and a red flag that requires a doctor's attention.
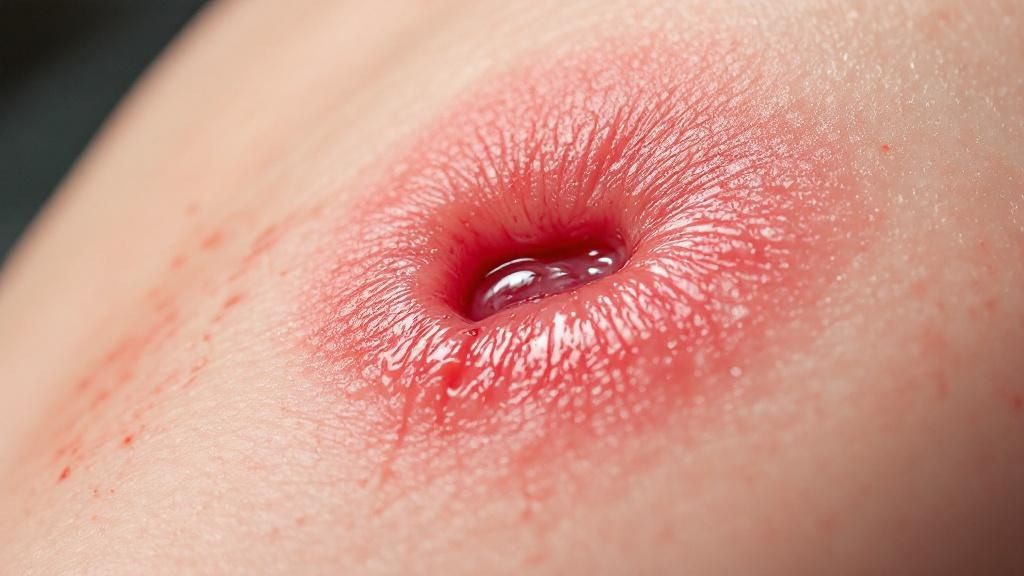
Differentiating Normal Healing From Infection Alarms
In the beginning, it can be tricky to tell what’s normal and what’s not. A little redness and warmth are common in both a healthy healing wound and the start of an infection. The real secret is learning to spot when those signs cross the line from "normal" to "concerning."
A great rule of thumb is to look for any symptom that is new, spreading, or getting worse instead of better. Your wound should be making slow, steady progress. If it suddenly backslides, that’s your body sending a clear signal.
Your wound should be on a healing trajectory—gradually improving day by day. Any sudden backward step, such as a sharp increase in pain or a change in discharge, is a signal from your body that it needs assistance. Never ignore these signals.
Your Visual Checklist for Potential Problems
Here’s a straightforward checklist of what to watch for during your daily dressing changes. Use these points to compare what you see on your own body to the common warning signs of a complication.
- Spreading Redness: A bit of pink around the wound edges is perfectly normal, especially in the first few days. But if that redness starts to expand outward, like a spreading stain, it’s a sign that an infection might be moving into the healthy skin around it.
- Increased Swelling or Warmth: Some swelling and warmth are expected right after an injury; that’s your body’s cleanup crew at work. The concern comes when the area gets more swollen after the first few days, or if it feels hot to the touch compared to the same spot on your other limb.
- Foul Odor: A clean, healing wound shouldn't have a strong, foul smell. If you notice a pungent, sweet, or just plain bad odor when you take off the dressing, that's a major red flag for bacteria.
- Yellow, Green, or Cloudy Discharge: It's normal to see a small amount of thin, clear, or pale-yellow fluid at first. However, if the drainage becomes thick, cloudy, or turns a milky white, yellow, or green, it's likely pus—a sure sign of infection. The amount of drainage should also lessen over time; if it suddenly increases, that’s another warning.
- Increasing or Severe Pain: Pain should slowly get better as you heal. If the pain at the wound site suddenly gets worse, becomes a throbbing ache that won’t quit, or just feels way too intense for the size of the injury, your body is telling you something is wrong.
When a Wound Problem Becomes a Body Problem
Sometimes, an infection that starts in the wound can begin to affect your whole body. If you notice any of the local warning signs from the list above plus any of the systemic symptoms below, you need to seek medical help right away.
These signs can mean the infection is spreading:
- Fever: A body temperature of 101°F (38.3°C) or higher.
- Chills or Sweats: Feeling shivery and cold, even in a warm room.
- Nausea or Vomiting: An upset stomach that shows up along with other wound symptoms.
- General Malaise: A vague but powerful feeling of being unwell, tired, or achy all over.
Spotting these issues is especially critical for chronic wounds, like leg ulcers, which can be notoriously stubborn. If these signs sound familiar, it’s time to act. You can learn more by reading about why a leg ulcer may not be healing.
When in doubt, always contact your healthcare provider. It’s far better to be cautious and get an expert opinion than to wait and let a small problem turn into a serious one.
Fueling Your Recovery With Nutrition and Lifestyle
While changing your wound dressing correctly is non-negotiable, true healing is a whole-body process that starts from the inside out. Think of your body as a construction crew and your wound as the project. To rebuild properly, that crew needs a steady supply of top-notch materials. This is where your diet and daily habits become your most powerful tools for recovery.
Great wound care patient education always looks beyond the wound itself. It’s about learning how to supercharge your body’s own incredible repair system. By paying close attention to what you eat, drink, and do every day, you can genuinely speed up how fast and how well you heal.
The Building Blocks of Recovery
When your body is healing, its demand for specific nutrients goes through the roof. Giving your body what it needs is the difference between giving that construction crew flimsy plywood or solid steel beams.
Here are the absolute essentials for wound repair:
- Protein: This is the foundation for all new tissue. Skin, blood vessels, and every other cell involved in the healing process are built from protein. Focus on lean sources like chicken, fish, beans, eggs, and tofu.
- Vitamin C: Think of this as the mortar that holds everything together. It’s vital for creating collagen, the tough, fibrous protein that gives new skin its strength. You'll find it in citrus fruits, strawberries, bell peppers, and broccoli.
- Zinc: This mineral is a crucial foreman on the job site, directing cell growth and the creation of proteins. Good sources include nuts, whole grains, and lean red meat.
You don't need a complicated meal plan. A simple breakfast of scrambled eggs, a salad topped with grilled chicken for lunch, and a handful of almonds for a snack can provide a powerful healing boost.
Healing a major wound can increase your body’s protein needs by up to 250% and your calorie needs by 50%. Not eating enough during this time is like asking your crew to build a skyscraper with half the necessary materials—progress will slow to a crawl.
How Daily Habits Can Speed Up or Slow Down Healing
Beyond what’s on your plate, your daily routines have a massive impact. Simple lifestyle choices can either put your recovery on the fast track or bring it to a screeching halt.
Hydration Is Key
Your blood is the delivery truck that brings all those healing nutrients to the wound. Water is what keeps those trucks moving smoothly. When you're dehydrated, your blood thickens, slowing down circulation and starving the wound of the oxygen and repair cells it desperately needs.
The Underrated Power of Rest
Your body does its most important repair work while you sleep. During deep sleep, it releases growth hormones that are absolutely essential for rebuilding tissue. Getting enough rest isn't lazy—it's an active part of the healing strategy.
Lifestyle Factors to Get a Handle On
On the flip side, a couple of common habits can seriously sabotage your body's ability to heal.
- Smoking: Nicotine causes your blood vessels to clamp down, dramatically cutting off the supply of oxygen and nutrients to your wound. The effect of just one cigarette can impair blood flow for hours. Quitting, even just while you heal, can make an enormous difference.
- Blood Sugar Control: For anyone with diabetes, this is critical. High blood sugar makes blood vessels stiff and less efficient, while also hindering the very immune cells that fight off infection. Keeping your blood sugar within your target range is one of the single most important actions you can take for your wound.
By actively managing your diet and lifestyle, you create the perfect internal environment for fast, effective healing. These choices are directly tied to better results, and you can learn more about how at-home care leads to positive wound care patient outcomes to understand the full picture.
Navigating Common Challenges in Wound Management
Let’s talk about the realities of day-to-day wound care. Even with a perfect plan, managing a wound at home can be challenging. You might be struggling with pain during dressing changes, dealing with itchy skin from the tape, or just feeling the emotional strain of a slow-healing wound.
These hurdles are completely normal, and you are definitely not the first person to face them. Good wound care patient education is about more than just a list of steps; it’s about anticipating these real-world problems and giving you the tools to overcome them. We want you to feel seen and equipped to make the daily process less stressful.
Managing Pain During Dressing Changes
Pain is easily one of the most dreaded parts of having a wound. Just the thought of an upcoming dressing change can cause a lot of anxiety, but a few simple adjustments can make a huge difference.
- Time Your Pain Medication: If your doctor has prescribed or approved pain medication, take it 30 to 60 minutes before you start. This gives the medicine enough time to kick in, which can make the entire experience far more manageable.
- Ask About Non-Stick Dressings: Does your dressing always seem to stick to the wound? Talk to your provider about non-adherent or silicone-based dressings. They’re specifically designed to protect the fragile healing tissue when you remove them.
- Soak, Don't Pull: Never rip off a dressing that’s stuck. Instead, gently dab the stuck edges with a little sterile saline or water. This will help the adhesive release without tearing your skin.
Soothing Irritated Skin
It's common for the skin around your wound to become red, raw, and itchy from adhesives and moisture. This is often called maceration or dermatitis, and besides being uncomfortable, it can actually get in the way of proper healing.
The skin surrounding your wound is just as important as the wound itself. Think of it as the foundation—it holds your dressing in place and acts as a barrier to infection. Protecting it is a top priority.
A great way to prevent this is to use a skin barrier wipe or spray before putting on a new dressing. These create an invisible film that shields your skin from tape and moisture. It also helps to switch up where you place the tape each time, giving sore spots a much-needed break. For a deeper dive, our guide to effective post-discharge wound care at home offers more tips.
Controlling Wound Odor and Emotional Stress
A persistent wound odor can be a source of embarrassment and make you want to avoid social situations, adding a heavy emotional weight to your recovery. While a foul smell can signal an infection, it can also be caused by the type of dressing or old drainage. Sometimes, simply changing the dressing more frequently (if your provider agrees) is enough to solve the problem.
The slow healing process itself can also be incredibly frustrating. It’s easy to feel defeated when it seems like you’re doing everything right, yet progress feels slow. Please remember that healing is rarely a straight line—it’s a journey with ups and downs. Patience is truly part of the process.
Sadly, many people feel unprepared for these kinds of challenges. Chronic wounds have been called a "silent pandemic," but there are still major gaps in knowledge. In fact, some studies show that even clinicians feel their own wound care training is insufficient. You can read more about these insights on wound care education to understand why being an educated and proactive patient is one of your most powerful tools.
Your Wound Care Questions, Answered
Even with the best instructions, you're bound to have questions as you go. That's completely normal. Good wound care is all about feeling confident in what you're doing day-to-day, so let's walk through some of the most common "what-ifs" we hear from patients.
Is It Normal for My Wound to Itch?
Yes, most of the time, an itchy wound is actually a good sign! Think of it as your body's internal construction crew at work. As new skin cells form and delicate nerve endings start waking up, it often creates that familiar itchy feeling. It's just a natural part of the healing process.
But, you have to look at the whole picture. If the itch is intense, comes with a new rash, or you spot other warning signs like spreading redness or more drainage, it's time to call your doctor. This could point to something else, like an allergic reaction to your bandage or a skin irritation that needs a different approach.
Can I Shower with My Wound?
This is a big one, and the only right answer is to follow your provider's specific advice. It all comes down to the type of wound you have and, just as importantly, the kind of dressing that's on it. Many modern dressings are designed to be waterproof, making showering much simpler.
If your dressing isn't waterproof, you'll have to be very careful to keep the wound completely dry. This usually means creating a makeshift seal with plastic wrap and tape before you hop in. Letting water seep into an unprotected wound can invite bacteria and really slow things down. If you're ever unsure, don't guess—ask your healthcare team.
Never assume a dressing is waterproof. Always double-check with your provider to avoid soaking your wound, which can cause a major setback in your healing.
How Can I Tell if I'm Using the Right Dressing?
Your doctor or wound care nurse chose your dressing for a reason. Each one is designed to create the perfect environment for your specific type of wound. For example, a wound with a lot of drainage needs a highly absorbent dressing, while a very dry wound might need a hydrogel dressing to add moisture back in.
If the skin around your wound looks overly red, irritated, or gets white and soggy (a sign called maceration), it’s a red flag. It often means the dressing isn't managing moisture properly. Using the wrong product can stall the healing process, so it's always smart to call your provider and confirm you're using the right tool for the job.
Will My Wound Leave a Scar?
It's likely. Most wounds that go deeper than the outermost layer of skin will leave some kind of scar. The good news is that how you care for your wound plays a huge role in how that scar turns out.
Your best defense against a prominent scar is following your care plan to the letter. Keeping the wound clean, covered, and properly moist helps new skin form smoothly without the interference of a thick, hard scab. After the wound has fully closed, be diligent about protecting that new, fragile skin from the sun for at least a year. Sun exposure can cause permanent dark spots on a new scar.
If you're dealing with a wound that just won't heal or feels too complicated to manage on your own, please know you aren't alone. Rapid Wound Care brings expert care right to your doorstep, collaborating with your primary doctor to give you the specialized support you deserve. To find out more, check out our at-home services.