
Understanding What Makes Compression Therapy Work for You
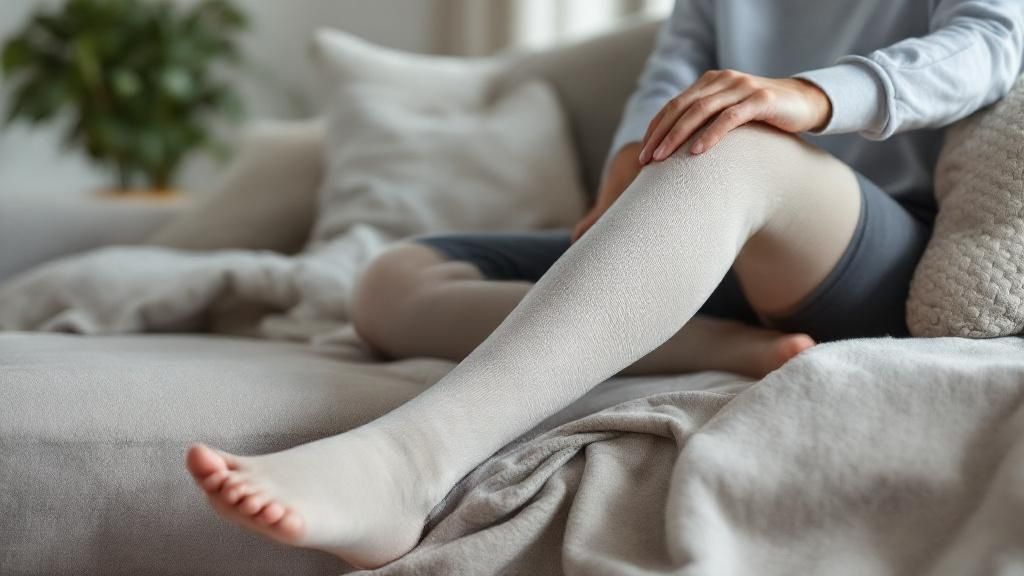
Let’s be honest, “compression therapy” can sound a bit intimidating. But at its core, it’s a simple, powerful concept: applying gentle, controlled pressure to a limb to help your body’s circulatory and lymphatic systems do their jobs better. Think of it as giving a helpful nudge to fluid that’s gotten stuck. This pressure helps move blood back toward the heart and encourages lymphatic fluid to drain, which is key for reducing swelling and discomfort.
This isn’t just a niche treatment; it's a mainstream solution for a growing number of people. The global compression therapy market was valued at about USD 4.25 billion in 2024, and it’s projected to reach approximately USD 5.34 billion by 2030. The biggest growth? It's happening in home healthcare, as more people discover the benefits of managing their conditions from the comfort of their own space. You can explore more market growth insights about home therapy trends on grandviewresearch.com.
Conditions That Respond Well to Home Therapy
So, who can really benefit from compression therapy at home? It's more common than you might think. Many people find significant relief for conditions such as:
- Varicose Veins: Helps improve blood flow and reduce aching and swelling.
- Lymphedema: A cornerstone of management, it prevents fluid buildup.
- Post-Surgical Recovery: Reduces swelling and can speed up healing. For more on this, you might be interested in our guide on at-home wound care.
- Sports Injuries: Aids in reducing inflammation and getting athletes back in the game.
When to Choose Home vs. Professional Care
While home therapy is effective for many, it’s not a one-size-fits-all solution. For chronic, non-healing wounds or severe circulatory issues, starting with professional guidance is crucial. A specialist can diagnose the underlying cause and create a safe treatment plan. Home therapy is your best bet for managing ongoing, stable conditions after you’ve received a proper diagnosis and instructions from a healthcare provider.
Choosing Compression Tools That Actually Work for Your Needs
Diving into the world of compression therapy at home can feel a bit overwhelming at first. You'll come across terms like mmHg, graduated pressure, and static vs. dynamic compression. The real trick is to find the tool that fits not just your medical condition, but your actual day-to-day life. A person managing varicose veins while sitting at a desk all day will need something very different from an athlete looking to speed up post-workout recovery.
The infographic below shows a typical routine for home compression therapy.
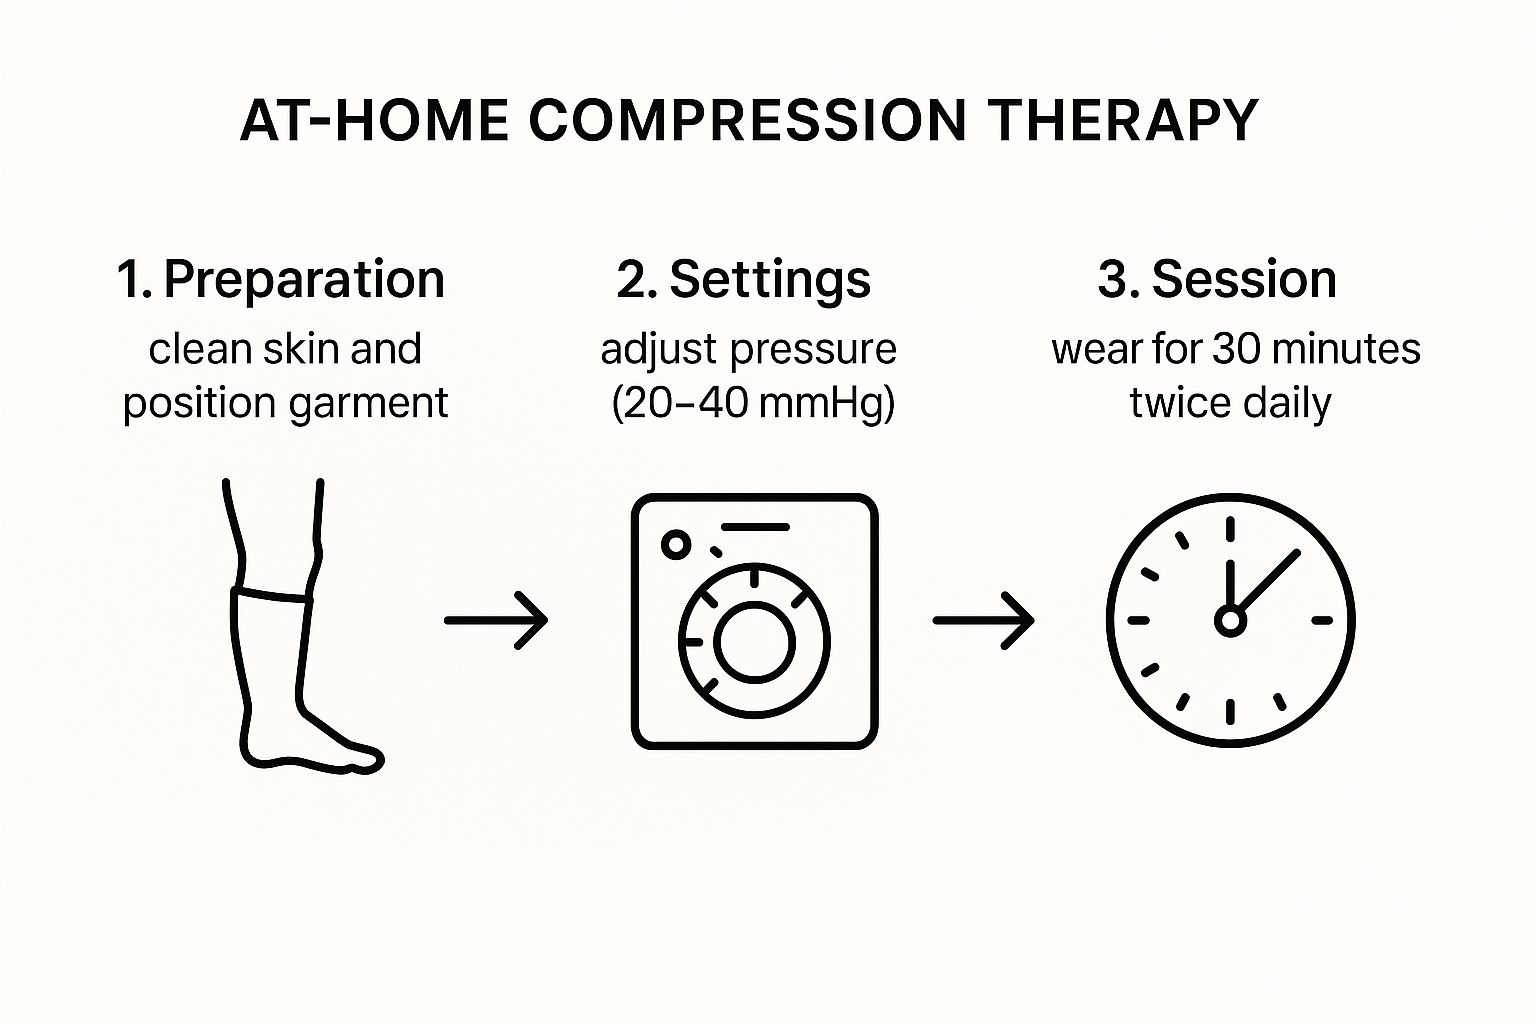
As you can see, consistency is everything. Sticking to a routine—making sure your skin is clean, using the correct pressure, and having regular sessions—is what will ultimately get you the results you're looking for.
Static vs. Dynamic Compression
Most people get their start with static compression. This includes your traditional stockings, sleeves, or bandages that apply a constant, steady pressure to the limb. It’s easy to see why they are so popular; static compression gear made up over 52.6% of the market in 2025 because it's affordable, generally comfortable, and simple to use for daily management. Their straightforward nature makes them a great entry point into home therapy. You can get more details on compression market trends from Coherent Market Insights.
Dynamic compression, however, uses pneumatic devices that inflate and deflate to create a massaging effect on the limb, which actively helps move fluid. Although they come with a higher price tag, these systems can be a game-changer for more severe swelling or lymphedema. They often become a critical part of a thorough home health plan. If you're considering more intensive treatments at home, it's worth understanding the 6 reasons home health care is essential.
Decoding Compression Levels (mmHg)
The pressure level of a compression garment is measured in millimeters of mercury (mmHg), and it’s the most important detail to get right. It's not a case of "more is better." The goal is to find the specific pressure that addresses your needs safely and effectively.
To help clarify which level might be right for different situations, here’s a quick guide.
| Compression Level (mmHg) | Condition | Recommended Use | Prescription Required |
|---|---|---|---|
| 15-20 mmHg (Mild) | Tired, achy legs; minor swelling | Everyday wear for people who stand/sit a lot; travel; preventing varicose veins | No |
| 20-30 mmHg (Moderate) | Moderate varicose veins; moderate edema | Post-surgical recovery; managing symptoms of venous insufficiency | Usually Yes |
| 30-40 mmHg (Firm) | Lymphedema; Deep Vein Thrombosis (DVT) | Treating severe edema and more serious venous conditions under medical supervision | Yes |
| 40-50 mmHg (Extra Firm) | Severe lymphedema; chronic venous issues | For advanced conditions requiring maximum containment, prescribed by a specialist | Yes |
This table shows that as conditions become more serious, the required compression level increases, and so does the need for medical guidance.
Ultimately, you should always talk to your doctor or a physical therapist to figure out the exact compression level you need. Using a level that's too strong can do more harm than good, while one that's too weak won't provide the benefits you're looking for.
Preparing Your Skin and Body for Maximum Comfort

Successful compression therapy at home isn't just about the garment itself. What you do before you even pull on a stocking or wrap can make a huge difference in your comfort and results. Skipping these prep steps is a common pitfall that often leads to skin irritation, discomfort, and less effective therapy.
A great piece of advice from healthcare pros is the "first-hour rule." Try to apply your compression gear first thing in the morning, right after you wake up. This is when swelling is typically at its lowest, before gravity and movement have a chance to take effect. It's far more comfortable and effective to contain swelling before it starts rather than trying to manage it after the fact.
Your Pre-Compression Checklist
Developing a quick routine before each session will help you avoid common issues like chafing or pressure spots. Think of it as a small daily ritual for your health that ensures both safety and comfort.
- Cleanse Gently: Always start with clean, dry skin. Use a mild, pH-balanced soap and gently pat the area dry with a soft towel. Remember, your skin might be sensitive, so avoid any aggressive scrubbing that could cause irritation.
- Moisturize Strategically: Hydrated skin is happy skin, but timing is everything. Apply a water-based moisturizer and give it a good 15-20 minutes to absorb completely. This simple step keeps your skin healthy and prevents lotion from degrading the elastic fibers in your compression wear. Never apply garments over damp or greasy skin.
- Inspect Your Skin: Before you put anything on, take a moment for a quick skin check. Look for any new redness, sores, or broken areas. If you're also managing a wound, proper care is essential. Our guide on effective post-discharge wound care at home offers practical tips. If you spot anything concerning, it’s wise to hold off on compression for the day and check in with your healthcare provider. This quick check is your first line of defense against complications.
Mastering Application Techniques That Feel Natural
This is where the real learning curve begins for many people starting **compression therapy at home**. Putting on a high-compression stocking isn’t like pulling on a regular sock; it really requires a specific technique. Getting it right ensures you get even pressure and comfort. Getting it wrong can lead to bunching, discomfort, and a less effective treatment. It’s helpful to think of it less like getting dressed and more like a therapeutic procedure.
Tips for Applying Compression Stockings and Sleeves
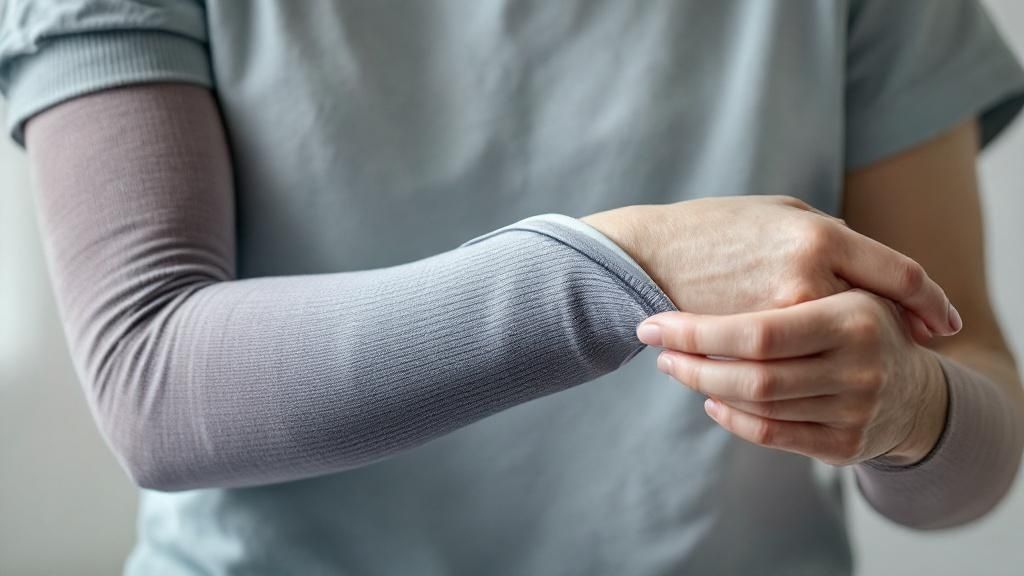
For many folks, the biggest hurdle is just getting the garment over the foot and past the heel. A common mistake is to scrunch up the entire stocking and try to pull it on, which almost always creates a tight, painful band at your ankle. Instead, physical therapists suggest a much more methodical approach.
By turning the stocking inside out first, you can smoothly guide your foot in and then roll the material up your leg. This helps you get an even fit without overstretching the fabric.
Here’s a practical way to do it:
- The Inside-Out Method: First, reach into the stocking, grab the heel pocket, and pull the stocking inside out, leaving the foot part open. Slide your foot in until your own heel sits perfectly inside the stocking's heel pocket.
- Smooth and Roll: Now, gently roll the rest of the stocking up your leg. Be sure to avoid pulling or yanking, which can damage the delicate fibers and lead to uneven pressure. Smooth out any wrinkles as you go, because these can create painful pressure points later in the day.
- Use Donning Aids: If you have arthritis or limited hand strength, donning aids can be a real game-changer. These are simple metal frames that hold the stocking open, allowing you to slide your foot in with much less effort. Rubber donning gloves are also great because they give you an excellent grip to smooth the fabric into place.
Proper Fit and All-Day Comfort
So, how do you know if the fit is right? The garment should feel snug—think of it as a firm, supportive hug—but it should never be painful, pinching, or numbing. If your toes feel cramped or start to change color, the garment is either too tight or you haven't put it on correctly. A key part of successful therapy, especially when dealing with related issues, is consistent and correct care. You can find more information on how home wound care speeds up recovery in a related guide we put together.
Always listen to your body. Don’t be afraid to take the garment off and try re-applying it to get a more comfortable fit.
Building a Sustainable Daily Routine That Sticks
Let's be real: the best compression therapy at home plan is the one you actually follow. Consistency beats perfection every single time, but that routine has to fit into your life, not some ideal version of it. A working parent’s schedule is completely different from a retiree's, so your approach needs to match your daily demands. The goal is to weave therapy into your day so it becomes a habit, not a chore.
This need for flexible home treatments is a big reason why the U.S. compression therapy market is expected to grow from USD 1.80 billion in 2025 to USD 2.33 billion by 2034. With more people managing venous issues from home, practical routines are more important than ever. You can discover insights about the U.S. compression market from BioSpace to see the full picture.
Creating a Personalized Schedule
Start by looking for small, consistent pockets of time in your day. Could you wear your garments while you sip your morning coffee or during the first half-hour of TV at night? When you're just starting, don't feel pressured to wear them all day. It's much better to increase the duration gradually as your body gets used to it. Someone who's retired might find it easy to wear their stockings from morning to evening, while a busy professional might prefer a focused session with a pneumatic compression device after work.
Staying Consistent and Motivated
Life happens, and you might miss a day. The trick is to not let it throw you off completely. Just get back on track the next day without feeling guilty. To keep your motivation up, try keeping a simple journal. Note your swelling levels, how comfortable you feel, and your energy. Seeing small wins—like your legs feeling less achy at the end of the day—can be incredibly encouraging.
Here are a few tips for specific situations:
- For Travelers: Always pack an extra pair of compression garments. Make it a priority to wear them during long flights or car rides to prevent swelling.
- For Active Individuals: Chat with your doctor about wearing lighter compression during your workouts and then switching to a higher-level garment for recovery afterward.
- For Seasonal Changes: Swelling can often get worse in the heat. Be prepared to be more diligent with your compression routine during the hot summer months.
Remember, this is a long-term commitment to your health. For those managing more complex issues like pressure injuries, consistency in all areas of care is vital. You can learn more about pressure ulcer treatment at home in our other guide.
Staying Safe and Monitoring Your Progress Like a Pro
Taking your compression therapy home puts you in the driver’s seat of your own health journey. This means becoming your own best advocate, and a key part of that is knowing the difference between normal discomfort and a genuine warning sign. When you’re managing compression therapy at home, it's common to feel a little tightness at first, but sharp, persistent pain is definitely not part of the plan. Learning to spot these differences is vital for both your safety and the success of your treatment.
This vigilance also applies to your gear. Think of your compression garments not as simple clothing, but as medical tools that have an expiration date. With daily use, you should expect to replace your stockings or sleeves every three to six months. Over time, the elastic fibers inevitably break down, and the garment loses its ability to deliver the prescribed pressure. When that happens, your progress can stall or even reverse.
Listening to Your Body: Red Flags vs. Normal Adjustments
Paying close attention to your body's feedback is non-negotiable. While some initial adjustment is normal as you get used to the pressure, certain symptoms are red flags that you should never ignore.
It's crucial to know what to look for when you're wearing your compression garments. The table below outlines key warning signs, their severity, and what you should do if you experience them.
| Warning Sign | Severity Level | Recommended Action | When to Seek Help |
|---|---|---|---|
| Sudden, sharp pain that doesn't ease up | High | Remove the garment immediately. | Contact your healthcare provider right away. |
| Numbness or a "pins and needles" sensation in toes or fingers | Medium to High | Remove the garment and elevate the limb. | If the sensation doesn't resolve within 15-20 minutes, call your provider. |
| Noticeable change in skin color (pale, blue, or dusky) | High | Remove the garment immediately. | This is an urgent sign; contact your provider or seek immediate medical attention. |
| New sores, blisters, or broken skin under the garment | Medium | Remove the garment, clean the area gently, and do not reapply over the affected skin. | Call your provider for instructions on wound care and to check the fit of your garment. |
| Increased swelling above or below the garment | Medium | Remove the garment and elevate the limb. | If swelling persists or worsens, contact your provider to reassess your treatment plan. |
The key takeaway here is to trust your instincts. If something feels wrong, it probably is. Removing the garment immediately and contacting your healthcare provider is always the safest course of action. It's far better to be cautious and get professional advice than to risk a serious complication like skin damage or restricted circulation.
Advanced Strategies for Long-Term Success
Making compression therapy at home a lasting part of your routine goes beyond just pulling on a stocking every morning. To truly get the most out of it for the long haul, you need to weave it into a broader set of healthy habits that work together to boost its effectiveness.
A simple but incredibly effective partner to compression is strategic elevation. Think about it this way: after your garments have been helping your circulation all day, you can give your system an extra hand. When you take them off in the evening, prop your legs up above your heart for about 15-20 minutes. This simple act uses gravity to help clear out any fluid that’s still hanging around.
Integrating Gentle Movement and Hydration
Another great way to support your therapy is by pairing compression with some light movement. You don't need a full workout; simple exercises like ankle pumps, calf raises, or even a short, brisk walk while wearing your compression garments can make a huge difference. The compression provides the external support, while your own muscle movements act as an internal pump, pushing fluid along more efficiently.
It might seem strange to drink more water when you're trying to manage swelling, but proper hydration is a key player. Staying well-hydrated helps keep your blood at an optimal consistency, making it much easier for your circulatory system to transport fluids. It’s a foundational piece of the puzzle for overall circulatory wellness.
Adapting Your Therapy to Life’s Changes
Your body and your needs aren't static, so your compression plan shouldn't be either. Life happens—your weight might fluctuate, you could start a new fitness routine, or even the changing seasons can impact swelling. Those who successfully manage their condition long-term learn to be flexible.
This could mean:
- Switching to a lighter, more breathable fabric during hot summer months.
- Talking to your doctor about adjusting your compression level after losing weight.
- Recognizing when a new activity is causing more swelling and adjusting your routine.
Keeping an open line of communication with your healthcare provider about these changes is crucial. They can help you determine if your current compression strategy is still the right one for you, ensuring your therapy continues to be safe and effective.
At Rapid Wound Care, we focus on giving patients the tools and knowledge to manage their health confidently at home. If you are managing complex conditions that need professional guidance, our at-home services deliver the expert support you need right to your door. Find out more about how we can help at RapidWoundCare.com.